July 25, 2026
The Intentional Desk: Why a Microphone Arm Earns Its Place in Your Workspace

The workspace shapes the work. Equip it deliberately. If you spend serious hours at a desk, the objects you put on it must earn their place. Most people settle for bulky tripod stands that crowd their keyboard and tangle with coffee mugs. Choosing a dedicated microphone arm for desk use changes the math of your workspace. It moves the gear off the surface and into the air. This isn't about status: it's about reclaiming the physical space you need to actually think.
You probably already know the frustration of a cheap arm that sags mid-call or a cable that snags on your monitor. A workspace should feel like it was built for you, not assembled by accident. This guide will help you choose and equip a microphone arm that stays out of your way until you need it. We will look at how to balance weight capacity with aesthetics and how to manage cables so your desk stays clear, open, and ready for the work.
Key Takeaways
- Reclaim your desk surface by moving gear into the air, leaving room for the tools that actually earn their place.
- Select a microphone arm for desk use that balances the weight of your gear with the reach your specific layout requires.
- Improve your posture by bringing the microphone to you, rather than hunching over a static tripod stand.
- Equip your workspace with intentional cable management to keep your environment clear and ready for the work.
- Identify the best pivot points for mounting so your gear stays accessible without obstructing your screens.
Why a Microphone Arm for Your Desk is a Space Management Essential
The workspace shapes the work. Equip it deliberately. Most people who spend serious hours at a desk treat their audio gear as an afterthought, plopping a bulky tripod right in the middle of their primary workspace. A traditional microphone stand is often a permanent resident that refuses to move; it crowds your keyboard and creates a barrier between you and your notes. Choosing a dedicated microphone arm for desk use changes that dynamic entirely. It moves the gear off the surface and into the air, allowing the desk to remain a place for thinking.
Beyond the physical footprint, there is the issue of noise. If your mic sits on the same wood or laminate as your keyboard, every click and tap travels through the stand and into your audio. An intentional arm decouples the mic from the surface. This reduces mechanical vibrations and ensures your voice remains the focus, not the sound of you typing an email during a call. It is a simple way to build a more professional environment without adding visual noise.
The Ergonomics of Better Audio
Bad posture is often a byproduct of bad gear placement. We lean into the mic to ensure we're heard, creating a physical "hunch" that leads to fatigue. By using a microphone arm for desk setups, you bring the audio to your natural seated position. You can sit back and maintain a neutral spine while the mic does the work. This intentional placement keeps your voice consistent and your body comfortable through long sessions. It’s about how you actually feel in your space at the end of the day.
Reclaiming the Desk Surface
A considered workspace should be able to shift between tasks. When the meeting ends or the recording is finished, a boom arm retracts. It disappears from your immediate field of vision. This leaves you with an open, clear surface ready for deep work or a reset. By clearing the footprint of traditional gear, you build a space that feels intentional rather than accidental. You are equipping your room with tools that earn their place and then get out of the way.
How to Choose the Right Boom Arm for Your Specific Setup
Don't buy the first arm you see on a top-ten list. Choosing a microphone arm for desk use requires a deliberate look at your existing gear and physical constraints. If you use a heavy studio microphone, you need high-tension springs. Many reliable arms are rated to support microphones weighing up to 2.2 lbs (1 kg). Without this tension, the arm will sag mid-sentence, forcing you to adjust it constantly. Look for internal springs and integrated cable channels. These features keep the aesthetic clean and ensure the operation remains silent. Nobody wants to hear a spring squeak in the middle of a client call.
Low Profile vs. Standard High-Reach Arms
Your screen layout dictates the arm's shape. If you use monitor laptop stands to keep your displays at eye level, a low-profile arm is often the better choice. These sit beneath your field of vision and slide under your monitors when not in use. Standard high-reach arms are the classic choice for those who need to swing the mic over large displays or complex multi-monitor setups. Consider your sightlines. The goal is professional audio that doesn't block your view of the work.
Mounting Stability and Desk Protection
Check your desk edge before you commit to a purchase. Most arms use a C-clamp, which requires a sturdy, flat lip to grab onto. If your desk sits flush against a wall or has a shallow frame, a grommet mount is the cleaner, more permanent solution. It requires a small hole through the surface but provides superior stability for heavier microphones. Always choose a mount with padded contact points. This protects your surface from the pressure marks and scratches that metal gear can leave over time. If you have questions about which mount fits your specific surface, you can reach out to us for guidance on building your setup.
Installing and Integrating Your Mic Arm into a Considered Workspace
The workspace shapes the work. Equip it deliberately. Once you have chosen a microphone arm for desk use, the placement of the base is your most critical decision. Don't just clamp it to the nearest corner. Identify the pivot point that allows the mic to reach your mouth comfortably while staying entirely out of your line of sight. A well-integrated microphone arm for desk setup should feel like a natural extension of your desk, not a physical barrier between you and your screen.
Balance the tension in the friction hinges. You want the arm to stay exactly where you put it, yet move with a light touch when you need to push it away. It is about finding that specific point where the hardware feels responsive rather than stubborn. To maintain this level of intentionality across your whole setup, equip the rest of your space with tech device accessories that follow these same minimalist principles. The small objects earn their place when they support the way you actually work.
Cable Routing for a Clean Aesthetic
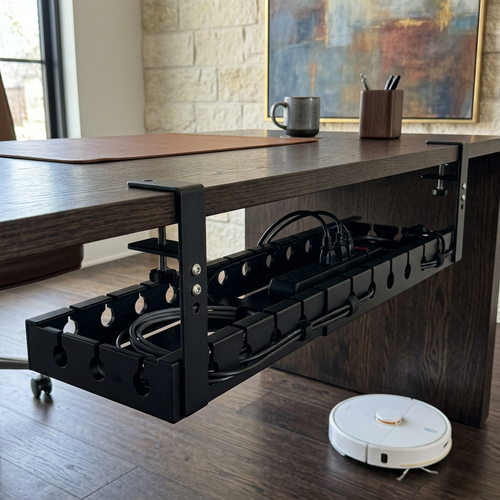
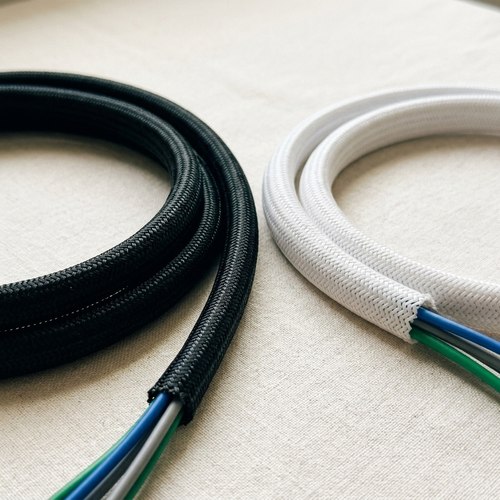
Draped cables are the enemy of an intentional workspace. They catch on your arm, snag on your chair, and add unnecessary visual noise to the room. Route your XLR or USB cables along the back of the boom arm using integrated channels or simple velcro ties. Leave just enough slack at the joints to allow for a full range of motion. This prevents strain on the connectors while maintaining a streamlined look that doesn't distract you from the task at hand. A clean setup is a productive one.
Final Adjustments for Daily Use
Test the arm in two distinct states: the active position for meetings and the stowed position for focus. It should disappear when the work is done. Ensure the retraction path doesn't collide with your lighting or monitor stands. If you have to move three other things just to park your mic, the placement isn't intentional yet. A workspace that gets used is one where every transition feels effortless.
Build a Workspace That Works for You
The workspace shapes the work. Equip it deliberately. Integrating a microphone arm for desk use is not about chasing a specific aesthetic; it is about reclaiming the physical surface you need to think and create. By moving your gear into the air, you clear the footprint of traditional stands and allow your desk to remain open for the next task. This is purposeful function in action, ensuring your tools support your body rather than forcing you to hunch over a static tripod.
A considered workspace relies on the small objects that earn their place. When you manage your cables and balance your gear, you remove the visual noise that distracts from deep focus. This minimalist design for intentional spaces ensures your room feels like yours, built specifically for the hours you put in. For the people who do the work, every adjustment matters. It's time to equip your space with intentionality.
Build a workspace that earns its place: Shop our Workspace Essentials
Your environment should be a place you choose to come back to. Start building the setup that makes your best work possible.
Common Questions About Desk Microphone Arms
Will a microphone arm fit on a thick desk or one with no lip?
Most microphone arms use a C-clamp that accommodates surfaces up to 2 inches thick. If your desk has no lip or a shallow frame, a grommet mount is the intentional choice. This involves drilling a small hole to secure the base directly through the surface. It provides a permanent, stable pivot point that won't slip or mark the edge of your desk.
Do I need a specific adapter for my microphone to fit the arm?
You likely won't need a separate adapter as most arms use standard 5/8" or 3/8" threading. Most microphones and shock mounts are built to these specifications. Check your gear before you buy; however, a quality microphone arm for desk use typically includes the necessary thread adapters in the box. This ensures your setup remains compatible even if you change your microphone later.
How do I prevent the microphone arm from squeaking during a recording?
Prevent squeaking by choosing an arm with internal springs and enclosed joints. Exposed springs often rub against metal, creating noise that ruins your audio. If you hear friction, apply a small amount of silicone lubricant to the pivot points. Don't over-tighten the friction hinges; they should be firm enough to hold position but loose enough to move without resistance.
Can a microphone arm hold a heavy mic like the Shure SM7B without sagging?
A high-quality microphone arm for desk setups can easily support heavy studio microphones if you choose a model with a high weight capacity. Microphones like the Shure SM7B weigh roughly 1.69 lbs and require high-tension springs to stay in place. Adjust the tension screw at the base or joints until the arm stays stationary. Equip your workspace with gear built for the work you do.
From the catalog